Removing The Cylinder Heads
- Share
- Issue Time
- Dec 2,2015
A Suggestion:
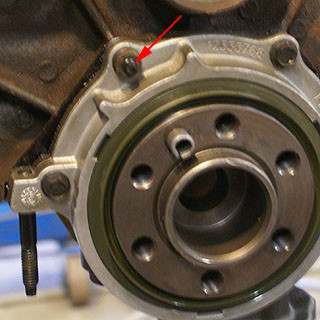
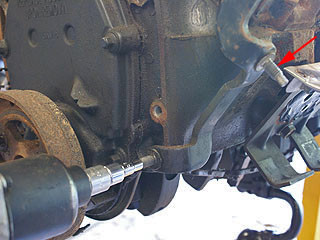
Before placing the engine on the engine stand,removing the nut and stud (red arrow) on the rear oil seal to the back of the engine block. The stud has a small hex on the end, but I don't know what size it is. (Probably metric, 6mm or smaller.)
Removing the stud should be done with an impact wrench to reduce the chance of breaking the thin stud.
because it might not be possible to remove the stud once the engine is mounted on the stand, and removing this stud makes it possible to install a new rear seal when the crankshaft is installed, rather than waiting until just before the engine is installed.
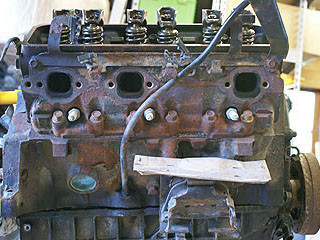
Removing Exhaust Manifolds:
removed the exhaust manifold bolts with an impact wrench and a 14mm socket. (A 9/16" socket may fit.)
The right hand side after the exhaust manifold had been removed.then to remove the metal bracket at the top of the cylinder head.
The left side showing the dipstick tube.
To remove this tube, drop the oil pan first, and then tap on the lower end of the tube with a hammer and a block of wood.
The oil pan is secured with 10 bolts and 2 nuts.
Suggest:
placing a large tray or catch-basin under the engine when turning it upside-down for the first time.
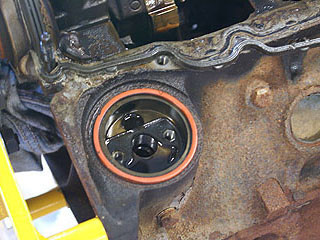
Oil Filter Adapter Location:
On a GM 350 cubic inch V8 engine, the oil filter would go here.But the Jimmy and Blazer have so little room beneath the engine that General Motors decided to run oil lines to the front of the car and place the oil filter under the radiator.This hole should be kept covered to prevent dirt and junk from getting into the oil passageways.
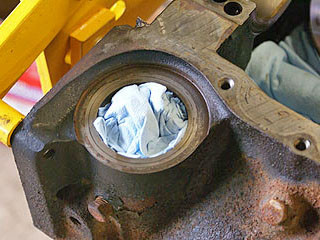
Keeping Dirt Out:
folded up a clean paper towel and stuffed it in the hole.Perhaps an even better idea would be to just re-install the oil filter adapter.
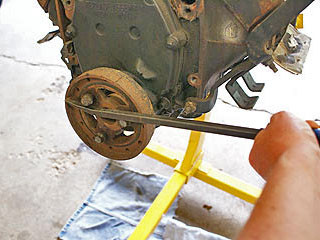
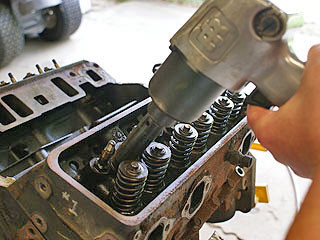
Removing Rocker Arms And Pushrods:
To turn over the crankshaft, placed the 3 pulley bolts in the harmonic balancer and used a large prybar to turn the crankshaft.
It's probably easier to just install the snout bolt (which is removed when the crankshaft pulley is removed) in the end of the crank, and then use a deep well socket and a breaker bar to turn the engine.
turned the crankshaft so each piston was at Top Dead Center (TDC), starting with cylinder number 1.use 1/2 inch socket to remove the nut on each rocker arm.

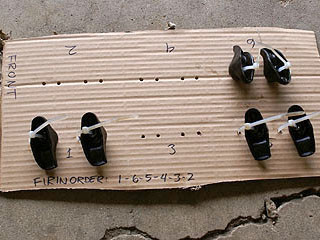
Carefully Storing The Rocker Arms:
To keep track of the rocker arms, use a piece of cardboard with holes punched in it.
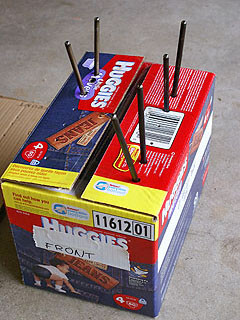
Keeping Track Of The Pushrods:
removed the pushrods and placed them in holes punched into a cardboard box.then wrote on a piece of duct tape on the box to mark the front of the engine.This will keep the pushrods in proper order so everything can be installed in the original positions
Miscellaneous:
removed the hang hook. It may be difficult to remove the right cylinder head with the hang hook in place.
The ends of these studs (red arrow) have a small hex, which fits a 1/4 inch socket. I used a 1/4 inch socket adapted up to the 1/2 inch square drive of my impact wrench to remove these studs.
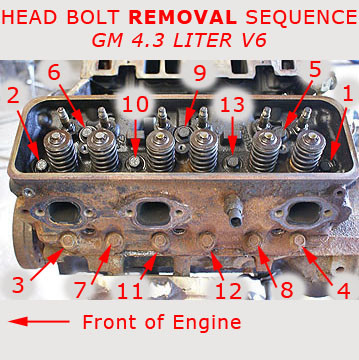
Removing Cylinder Head Bolts:
The head bolts MUST be removed in the proper sequence, or else there is a risk that the head can warp.
Removing Cylinder Head Bolts:
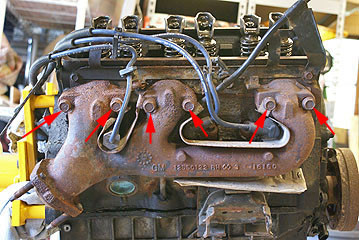
removed the head bolts in the proper order (the opposite of the tightening sequence), which is basically from the outer edges toward the center.
marked up this picture to illustrate the head bolt removal sequence.This photo shows the right-hand (driver's side) cylinder head.
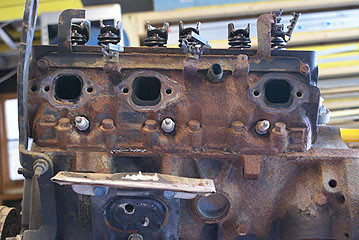
Left-Hand Cylinder Head:
With the sequence shown above, the last bolt removed is in the middle row between the two exhaust ports that are farthest apart.
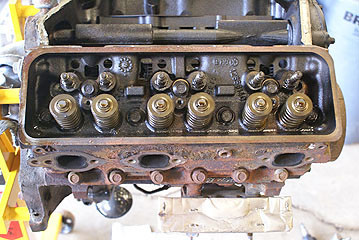
After removed the head bolts,pried up the cylinder heads and lifted them off the engine block.Getting the head to separate from the engine block wasn't easy.
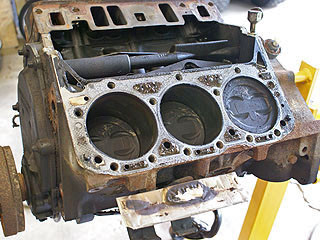
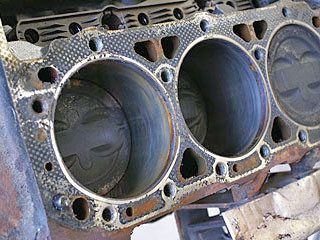
Rust INSIDE The Engine !!
The left bank of cylinders.Note the slight amount of rust on the walls of cylinder number 6 (at the left of the picture).