How to Replace Oil Cooler Lines In A 1999 GMC Jimmy or Chevy Blazer
- Share
- Issue Time
- Dec 9,2015
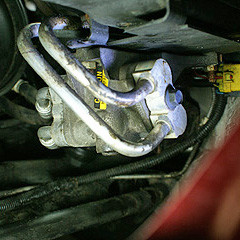
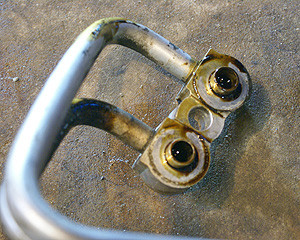
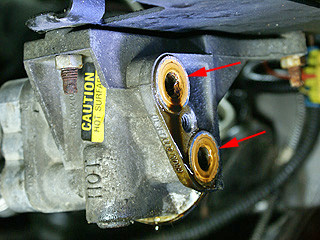
The Oil Cooler Lines:
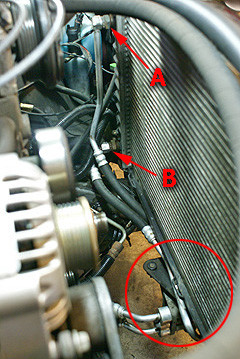
- Arrow "A" points to the upper oil cooler connection that needed to be removed.
- Arrow "B" is the lower connection.
- The red circle indicates the location of the oil filter. The lower end of the oil cooler lines connect here, but are not visible in this photo
.
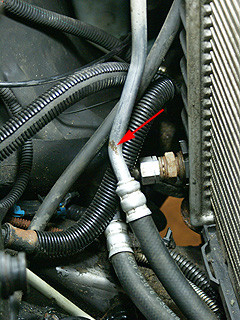
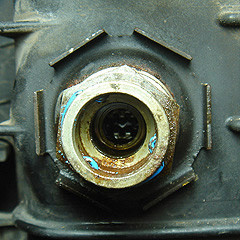
A Closer View:
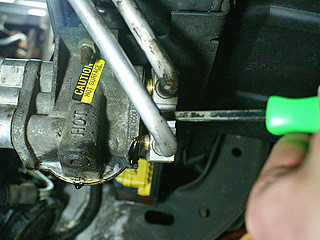
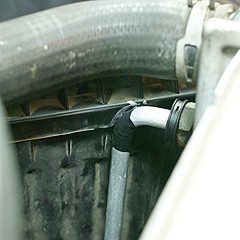
Removing The Oil Lines From The Radiator:
To drain the cooling system and removed the upper radiator hose for easier access.
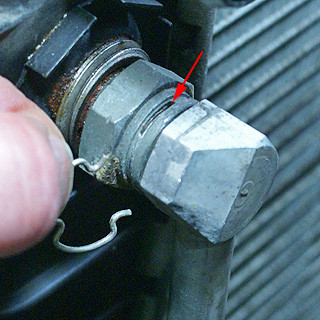
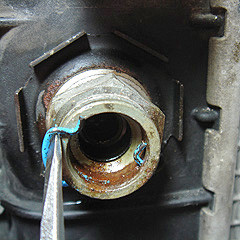
The oil cooler lines are connected to the radiator by a simple snap ring (red arrow).
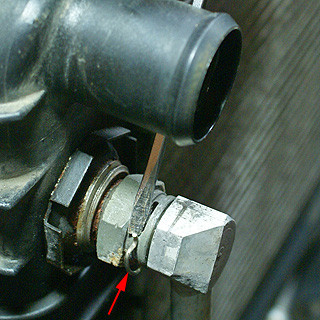
Use a small screwdriver to push on the end of the snap ring and remove it.
The snap ring goes into a set of 3 rectangular slots (arrow).
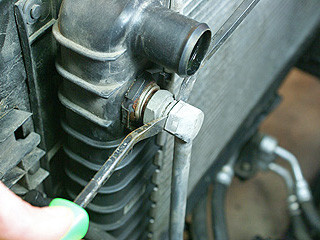
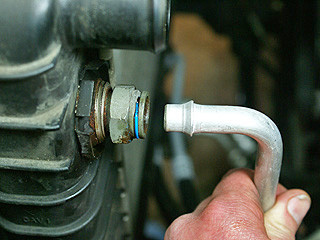
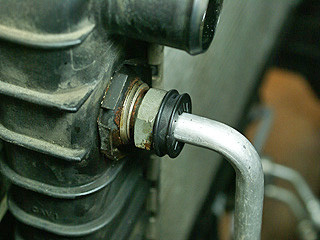
Upper Oil Cooler Connection:
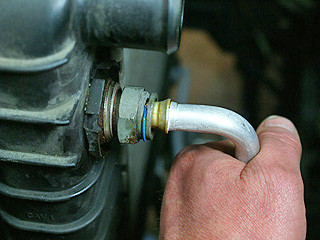
Use two small pry bars to carefully push the tube away from the radiator, using a twisting action to separate the parts.
Be careful to avoid prying near the slots because figured the metal could break easily, and then need to replace the adapter fitting.
As soon as opened this connection, oil started dripping from the oil filter housing, so should put a catch basin under it.
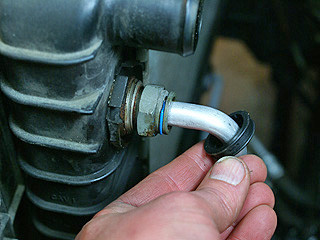
In hindsight, the upper tube would be easier to remove if it was rotated back-and-forth before using the pry bars. But... that might bedifficult while the other end of the cooler lines are still attached to the oil filter housing. So maybe removing the lower connection first is the better approach.
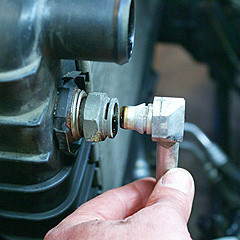
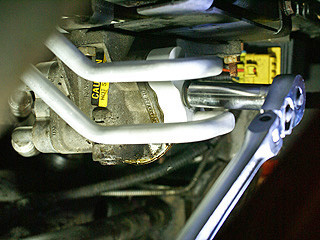
The lower oil line connection was very tight, so used a 7/8 inch wrench to wiggle the fitting back-and-forth. While there are wrench flats on the ends of these tubes, they are NOT nuts that rotate.
After loosening the connection with the wrench,wiggled the pipe by hand while pulling, and it came right out. Maybe prying isn't such a good method.

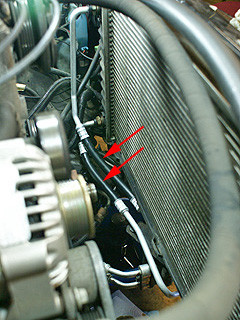
The oil cooler lines are indicated with red arrows. The lines to the left of the filter housing go to the engine.
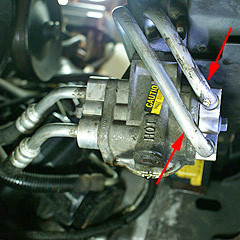
Another view of the oil filter housing (seen through the opening in the front bumper).
Using a 13mm socket, removed the bolt that held the lines to the filter housing.This bolt was REALLY tight.
pried on the metal block, right between the two pipes, and the oil lines separated from the filter housing.
More oil dripped from here, so put a dishpan underneath.
The new and old oil cooler lines.The new part was a little different from the original. The tubing stuck out farther at the radiator connections.
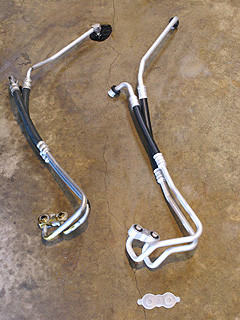
The new part has slightly different connections.
The original part didn't have the built-in gasket.
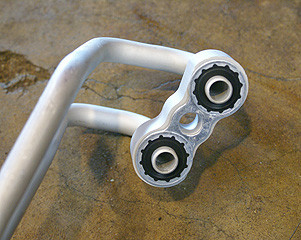
The original gaskets (red arrows) stayed on the filter housing.be carefully pried these off and sprayed the area with brake cleaner to remove the oil.
Then again, maybe it doesn't hurt to have some oil on the mating surfaces.
installed the lower end of the oil cooler lines, but this time use a deep socket because the tubing has a different design.
tightened this bolt pretty hard, and leery of stripping the threads in the aluminum block of the oil filter housing.
The new oil lines came with new retaining clips, which are the blue ones.
The instructions say "Do not reuse the original retaining clips".

To get the new retaining clip into place properly.Placed one end into a slot and then used a small screwdriver to lift the other end over the "hump".
The 3 "ears" of the retaining clip each need to engaged in a slot, so the ears are visible when you look straight into the hole.You can barely see the third ear, just left of top-center.
left the protective caps on the ends until be ready to insert the tubes into the radiator.
Dabbed a little oil on the ends of the tubes before inserting them into the fittings. Can't hurt, might help.
pushed the oil line into the radiator fitting until it made a "click" sound.
black plastic ring fits over the end of the fitting,keeps that blue retaining ring from falling out
The completed oil line installation.The arrows indicate the new oil lines.
Trouble:
The plastic air filter box rubbed against the top oil cooler line, because the tube had a different way of making that right-angle turn.
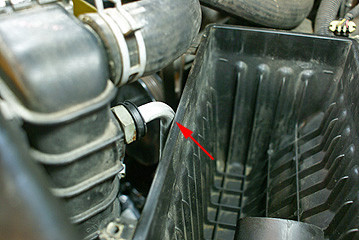
So wrapped the tubing with electrical tape where it touched the air filter box.The purpose of the tape is to highlight how much abrasion is occurring here.
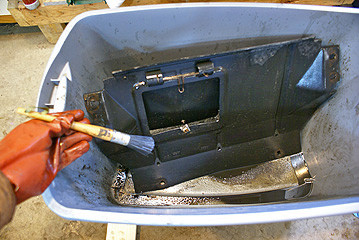
Cleaning The Splash Guard:
The plastic splash guard had a lot of oil and dirt on it. placed the splash guard in a large Sterilite tote bin and poured about a cup of miineral spirits in the bottom. Then dipped the parts cleaning brush in solvent and brushed all the oil/dirt until it I could see bare plastic. After wiped off the solvent with a paper towel, sprayed the splash guard with brake cleaner and let it dry before putting it back on the car.