How to Replace an A/C Condenser
- Share
- Issue Time
- Jun 29,2016
Safety Tip:
Always wear safety glasses when working on your vehicle. Wear other personal protective equipment (PPE) when necessary, for example latex gloves or closed toe shoes.
Always wear safety glasses when working on your vehicle. Wear other personal protective equipment (PPE) when necessary, for example latex gloves or closed toe shoes.
1
Secure the vehicle on a level surface, making sure the vehicle will not roll or lean too much when jacked up.
2
Lift up the front of the vehicle using a jack.
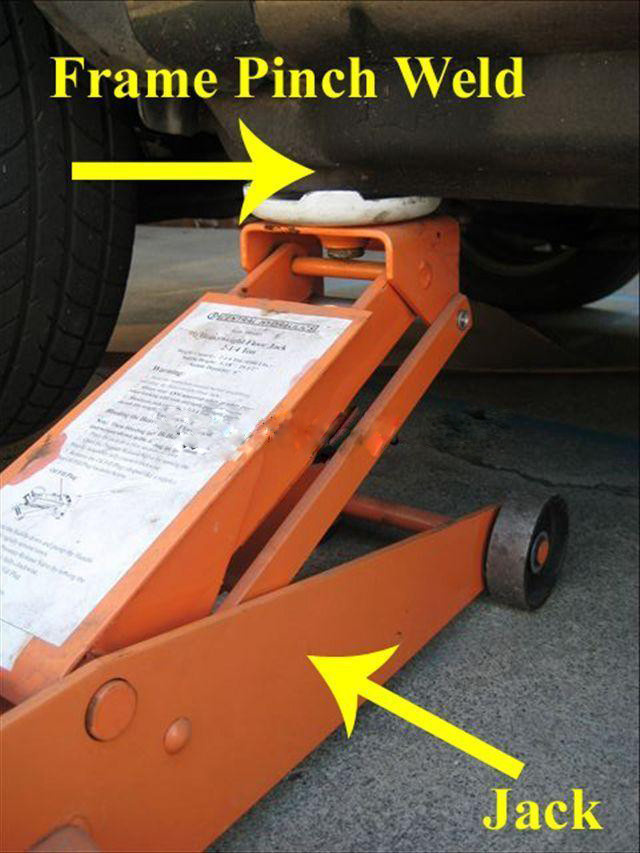 Photo may not be specific to your vehicle
Photo may not be specific to your vehicle3
Secure the vehicle with jack stands on both sides for safety before starting any work. The pinch welds and the frame are the two best locations. Do not rely on the jack to hold the vehicle up while working.
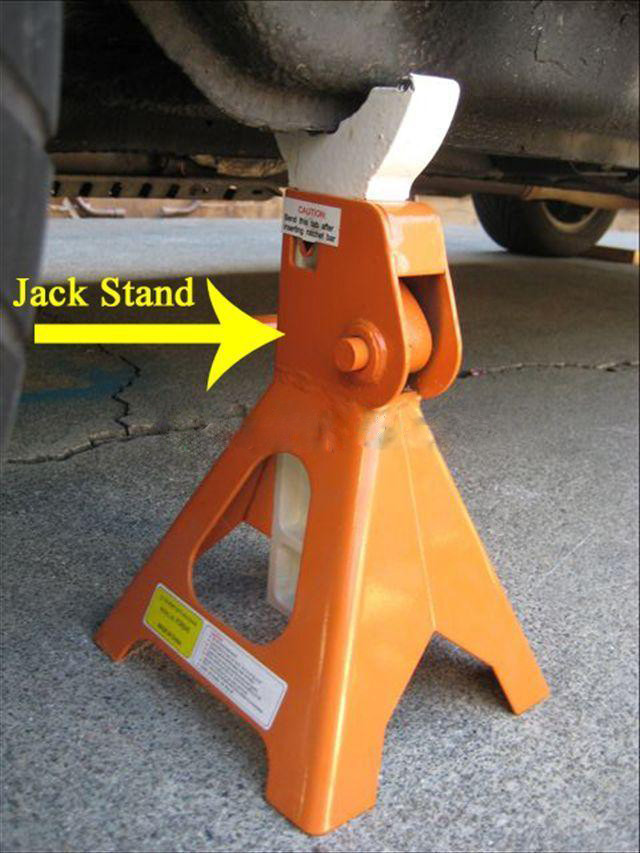 Photo may not be specific to your vehicle
Photo may not be specific to your vehicle4
Find the correct size socket and large ratchet or tire iron and turn the wheel lug nuts counter clockwise. Remove the front wheels.
5
Inspect the CV boot for damage.
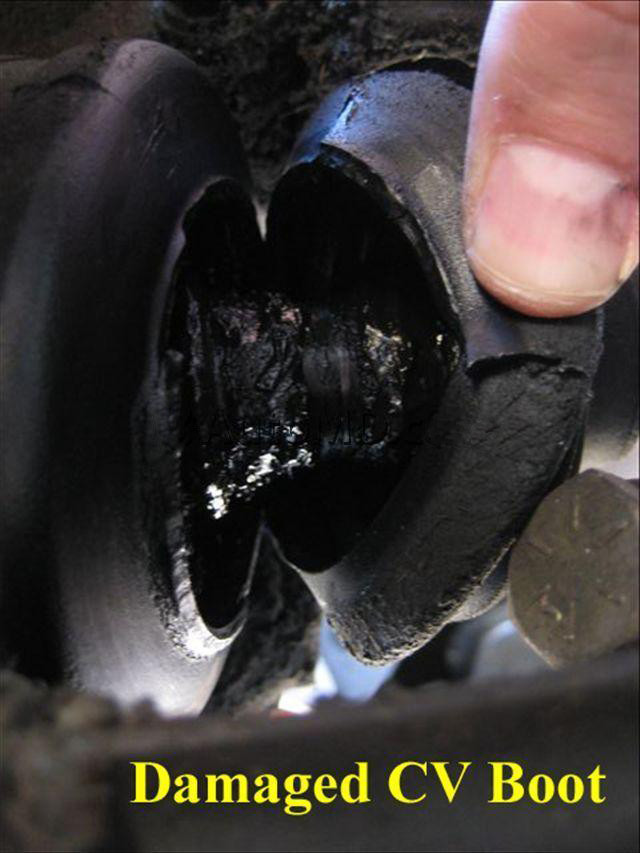
Photo may not be specific to your vehicle
Photo may not be specific to your vehicle
6
Mark the axle for installation reference. Remove the CV joint axle assembly.
7
Using a bench vise, hold the shaft of the CV joint secure so that you can separate the CV joint from the shaft. Remove the CV boot clamps.
8
Slide the CV boot off the outer CV joint.
9
Using a rubber mallet, knock the CV joint off of the axle shaft.
10
Remove the old boot from the CV axle shaft and wipe off any old grease.
11
Fill the new CV joint with grease and get it ready to slide back onto the shaft.
12
Slide the new boot onto the shaft but do not tighten the inner clamp yet. Install a new retaining clip before putting the joint and axle together.
13
Slide the new CV joint onto the axle shaft completely.
14
Pack the boot with grease and slide the boot over the new CV joint housing. Secure the boot with new clamps.
15
Install the CV joint and axle back into the vehicle in the reverse order that it was removed.
16
Mount the wheel back onto the hub assembly.
17
Tighten lug nuts in a star pattern and torque to suggested manufacturer specifications in the vehicle owner's manual.
18
Remove jack stands.
19
Lower vehicle with jack until it is securely on the ground.
20
Drive the vehicle to make sure that any noises are no longer present and that there are no indications of wearing parts. Before road testing, visually inspect the area you have worked on to make sure everything is tightened and assembled properly.