Bleeding Your Own Brakes With a Hand-Held Vacuum Pump
- Share
- Issue Time
- Jun 24,2020
Tools Needed for Bleeding Your Car's Brakes
- Hand-held vacuum pump
- New brake fluid (type recommended for your brake system)
- Floor jack
- Jack stand
- Lug wrench
- Line wrench (10mm or 11mm)
- Shop towels
- Teflon tape, if necessary
- Grease, if necessary
- Vehicle repair manual, if necessary
1.Four Tips for Successful Brake System Bleeding
- Check the sequence the manufacturer recommends when bleeding your particular vehicle model and stick to that order. Consult your car owner's manual or vehicle repair manual.
- Always use new brake fluid when bleeding the brake system: Once you open a container of brake fluid, it begins to accumulate humidity. So using brake fluid a few weeks old will rust components in your brake system at a rapid rate. That's why manufacturers recommend replacing the brake fluid in your car every two or three years.
- To make your job easier, before you start bleeding a brake line, remove the bleeder screw from the caliper or wheel cylinder and apply some Teflon tape (about three turns) to the threads and replace the screw.
- After connecting the tube fitting from the pump to the bleeder screw, cover the fitting and screw union with grease (any type). This will prevent introducing air bubbles into the stream that might confuse you with the regular air (if any) you want to purge out of the system.
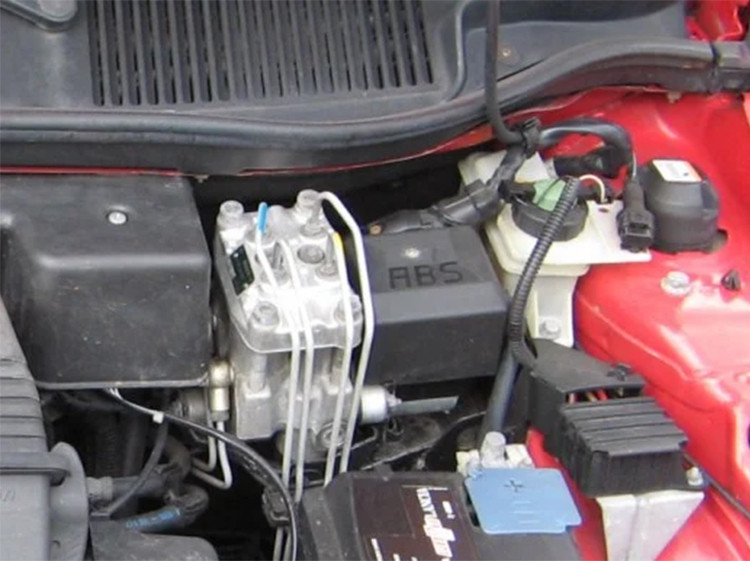
2. What You Need to Know About the ABS in Your Car
- If you own a 1996 or older model with ABS system that connects to the four wheels, and you want to bleed air out of the brake master cylinder or hydraulic control unit (HCU), most likely you'll need a special adapter or device for the control module to purge air from the HCU.
- Also, if you need to work on a master cylinder that comes with the pressure modulator (aka ABS actuator) as part of the unit, you may need special equipment. For example, depending on your particular model, you may need a special electronic device or special scan tool to operate the solenoids, valves, and pump during the bleeding procedure. So you may need to take your vehicle to the shop for service.
- Consult the service manual for your particular make and model for more information, especially if you own a GM vehicle.
3. How to Bleed the Brakes Using a Vacuum Pump
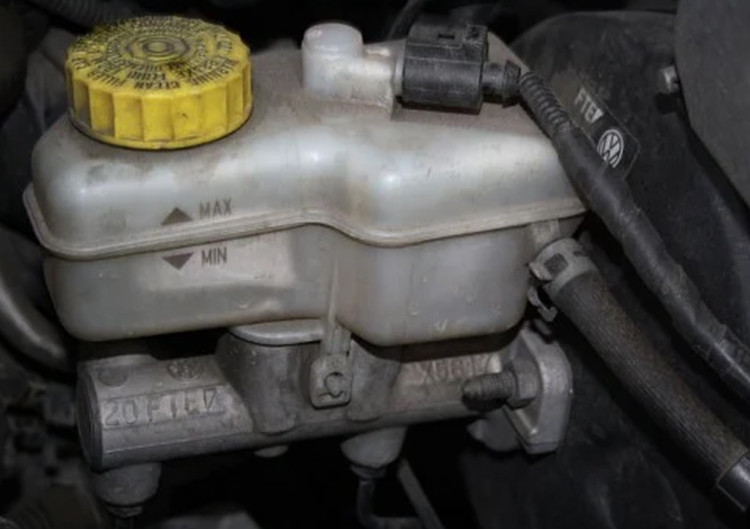
1. Before you remove the cap, wipe the brake master cylinder clean with a shop rag to get rid of grease and dust so you don't contaminate the brake hydraulic system, and follow the next suggestions:
- When flushing the system, remove as much fluid from the reservoir using your vacuum pump or turkey baster and add new brake fluid up to the MAX mark.
- Loosen the cap on the reservoir but don't tighten it. Keep the cap on the reservoir opening though. This will prevent forming a vacuum during the procedure.
- Watch the fluid level and don't let it go beyond the MIN mark to keep air out of the system during the bleeding or flushing procedure. Otherwise, you'll need to start purging the system all over again.
2. Ready your vacuum pump by connecting the reservoir jar and the appropriate tubing and adapter that will connect the jar to the bleeder valve or screw in the wheel cylinder or caliper to prevent outside air from being sucked into the jar as much as possible.
3. Depending on your vehicle make and model, you may need to remove the wheel on the assembly you need to work on to reach and work comfortably during the bleeding procedure. If necessary, loosen the lug nuts on the wheel, raise the wheel with a floor jack, secure the vehicle with a jack stand and remove the wheel.
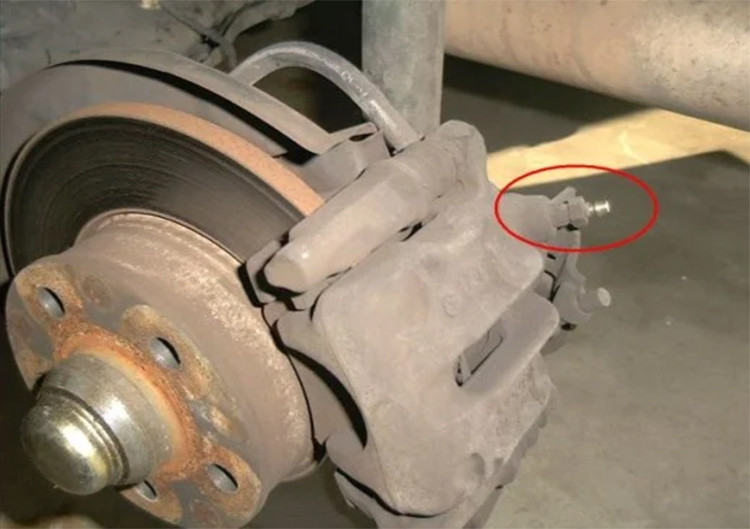
4. Thoroughly clean the bleeder screw to prevent oil or grease from entering and blocking the bleeding tube.
5. Choose the correct line wrench size to turn the bleeder screw open and close. Place the wrench in position, if necessary, before connecting the bleeding tubing to the bleeder screw.
6. Loosen the bleeder screw, but don't force it; if necessary, spray some penetrating oil on the screw and tap the screw lightly with a rubber mallet or hammer. Then try loosening the screw.
7. Connect the bleeder tubing to the bleeder screw.
8. Without starting the engine, pump the brake pedal at normal foot pressure, about 10 times, to get rid of any residual vacuum out of the brake booster.
NOTE: Watch the fluid level in the reservoir as you bleed the lines, or you'll bring air back into the system and you'll have to start the bleeding procedure all over again.
9. Add brake fluid to the brake master cylinder reservoir to bring the level up to the MAX mark, if necessary. Place the lid back on the master cylinder reservoir but don't tighten it.
10. When ready, squeeze the pump handle 15 times.
11. Then, turn the bleeder screw or valve open about 1/2-inch. This will cause brake fluid to flow into the bleeder jar.
12. Watch the size of the bubbles in the stream of fluid going into the jar. Keep pumping until the fluid level in the jar is about an inch from the cap.
13. Tighten the bleeder screw, and remove the fluid collected in the jar; reinstall the jar and repeat steps 9 through 13, until you have purged or flushed the line.
14. Add new brake fluid to the master cylinder reservoir, if necessary.
15. When ready, move on to the next wheel assembly and repeat the procedure to bleed the brake line.
16. When you finish bleeding the four brake lines, check that you have tightened all bleeding screws. After depressing the brake pedal several times, examine the bleeding screws for leaks.
17. Verify that the brakes feel solid (not spongy); hold your foot on the brake pedal applying normal stopping pressure. The pedal should hold pressure without falling to the floor. Otherwise, there's air in the system you need to purge.
18. Carefully, test drive your car around the block at low speed to confirm the repair.
4. Do I Need to Bleed All Four Lines?
You don't necessarily need to bleed all four lines from the system. For example, if you replace a single brake caliper, wheel cylinder, or rubber hose, you only need to bleed that line.
However, you need to bleed all four brake lines if:
- you had to remove or disconnect the brake master cylinder for repairs.
- the fluid level dropped drastically in the reservoir.
- you feel a spongy brake pedal.
Consult your car owner's manual or repair manual for more information
5. How to Bleed the Brake Master Cylinder
- Get your vacuum pump ready by connecting the pump's reservoir jar with a piece of tubing. Then attach a length of tubing of the appropriate size to the reservoir jar; you'll need to connect the other end of the tubing to the master cylinder's ports, in turn, during the bleeding procedure. Use tubing and adapters of the appropriate diameter that come with your kit. (Usually, manufacturers include a couple of plastic tubes and plugs with their units for bleeding as well.)
- Ask an assistant to hold the piece in place during the bleeding process with the push-rod end at a slightly higher angle than the opposite end. Or you can use a vise, but be careful not to damage the cylinder's body when securing it to the vise.
- Fill the cylinder reservoir with new brake fluid. Use the fluid type recommended by your vehicle manufacturer. During the bleeding procedure, don't let the brake fluid reach bottom to prevent air from entering the cylinder; otherwise, you'll need to start the bleeding process all over again.
- Unplug one of the cylinder ports and plug in the vacuum pump to it.
- Pump the cylinder until you see brake fluid free of bubbles entering the pump's reservoir jar.
- Disconnect the pump from the outlet port and tightly plug the port.
- Repeat the bleeding procedure in the other port(s).
- Now, with all the ports plugged, position the cylinder push-rod end at a slightly lower angle than the opposite end.
- Then, use a Phillips screwdriver or a punch to slide the cylinder push rod in and out about 1/8 inches. Repeat until you see no bubbles in the master cylinder reservoir.
- Raise the angle of the push-rod end again and bleed the cylinder again through the ports.
- Now you can install your new brake master cylinder.