How to install Timing Chain Engine Rebuild Part 8
- Share
- Issue Time
- Jan 27,2016
Installing The Timing Chain and Sprockets:
First,remove the Woodruff key from the old crankshaft and tap it into the slot in the new crank.
slipped the crankshaft timing sprocket over the end of the crankshaft and aligned the slot with the key.
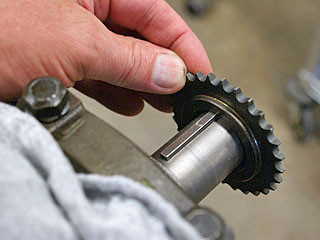
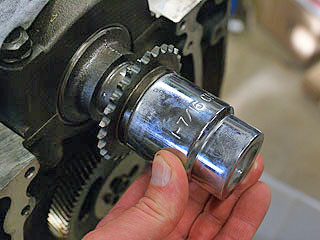
To drive the sprocket all the way onto the shaft, used this 1-7/16 inch socket from a set of 3/4 inch drive sockets. It's important to hammer uniformly on the sprocket as close to the center as possible, without hitting the key
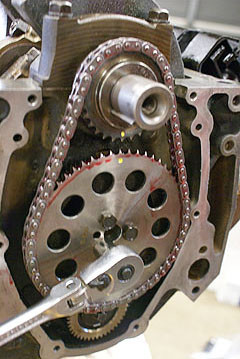
turned the crankshaft until the alignment mark on the small sprocket was pointing straight down. (I colored the alignment marks yellow so they would show up in photos.)
placed the large sprocket on the end of the camshaft and turned it until the mark aligned with the mark on the crankshaft sprocket.
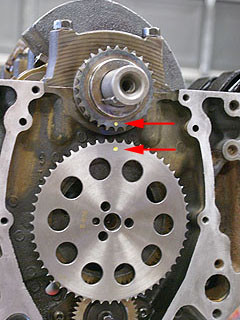
drizzled some assembly lube all over the timing chain and slipped the chain over the camshaft sprocket first.Then placed the chain over the crank sprocket so the gears were aligned properly, and installed the 3 bolts that hold the cam sprocket to the camshaft.
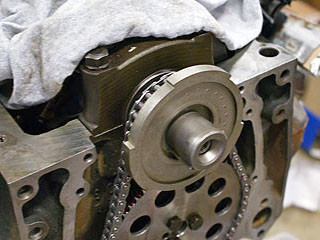
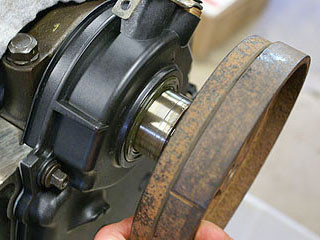
installed the crankshaft sensor reluctor on the end of the crank. used a 1-1/2 inch socket (from my set of 3/4" drive sockets) to drive this part onto the shaft. The timing gear and reluctor will be held tightly in place by the harmonic balancer.
Installing The Timing Chain Cover:
removed the crankshaft position sensor from the old timing cover by removing the bolt with an 8mm socket and pushing out the sensor from the inside.cleaned up the sensor with paint thinner. replaced the original O-ring when installed the sensor on the new timing cover.

placed the timing cover on the engine and tightened the bolts part way, using a 10mm socket.and left the bolts loose so the harmonic balancer will establish the exact position of the cover.
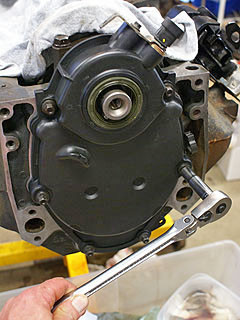
Installing The Harmonic Balancer:
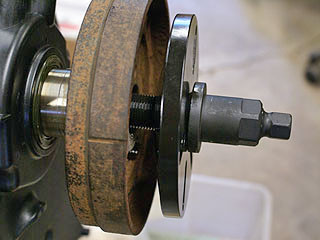
threaded the adapter into the end of the crankshaft and snugged it with a 12 mm wrench, following the instructions of the balancer remover/installer kit.
slathered some oil on the inside surface of the harmonic balancer and placed it on the end of the crankshaft, making sure to align the keyway with the key in the crank. also oiled the surface that rubs against the front oil seal.
threaded the installer shaft onto the adapter, with the black metal plate so its flat surface was away from the engine.
Note that the 3 bolts used to remove the harmonic balancer are NOT needed when installing the balancer. The black disc just pushes on the harmonic balancer.
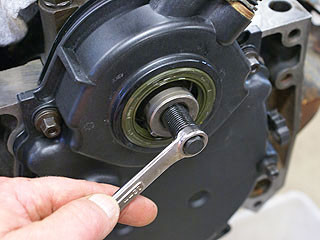
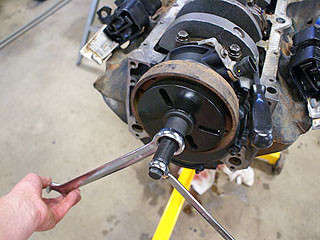
used a 1-1/16 inch wrench to turn the lsrge shaft (which pushes the round plate forward) while using a 5/8 inch wrench to hold the center shaft.It took a lot of effort to turn the large wrench...
While turning the big wrench, the crankshaft wanted to rotate, so I placed a prybar between the engine block and one of the counterweights built into the crank. Eventually the balancer "bottomed out" and I couldn't turn the big wrench anymore.
Note that the screw threads on the installer/remover tool need to be oiled every time the tool is used.
removed the threaded adapter that came with the balancer remover/installer set.

An Extra Problem:
Replacing The Engine Mounts:
The driver's side engine mount broke when we removed the engine, so I decided to replace both motor mounts
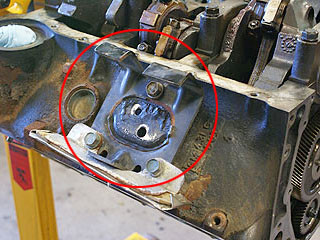
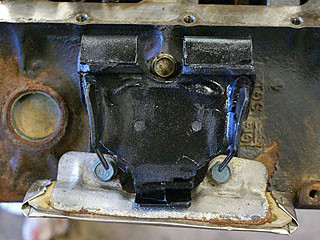
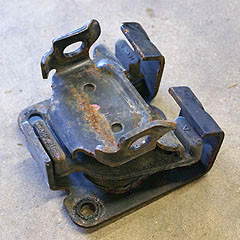
This is what the engine mount is supposed to look like.
There is a long bolt that goes through the holes. The ears sit on a block of metal on the frame which has a hole through it.
The part with the ears is bonded by a piece of rubber to the part with the two J-shaped "prongs", which is bolted to the engine.
Replacing the engine mount is easy when the engine is out of the car.
I just removed the three bolts and installed the new mount. I used some blue (medium strength) thread locker (Loctite) on the threads of the bolts.