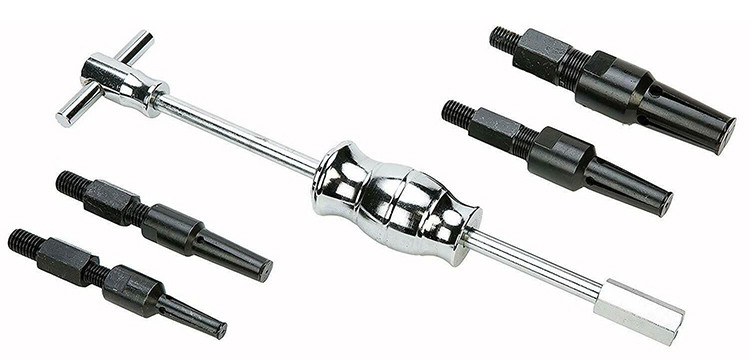
New instructions_Slide Hammer and Bearing Puller Set
- Share
- Issue Time
- Jul 26,2022
Summary
New instructions_Slide Hammer and Bearing Puller Set,wholesaler and manufacturer of inner bearing puller,Custom,OEM
New instructions_Slide Hammer and Bearing Puller Set
|
Specification
|
||
|
Collet Size /
Bearing Depth
|
3/8" – 1/2"
(1-1/2" Maximum Bearing Depth / 3/8" Hex Drive) 9/16" – 11/16 " (1-3/4" Maximum Bearing Depth / 3/4" Hex Drive) 5/8" – 1" (1-3/4" Maximum Bearing Depth / 3/4" Hex Drive) 1" – 1-1/4" (2" Maximum Bearing Depth / 1" Hex Drive) |
|
|
Slide Hammer
Weight
|
3 lb with Handle 1.95 lb without Handle
|
|
Operating Instructions
NOTE: To open or close the Attachment
Clamps, grasp the Attachment head
firmly and twist the Handle (2) of
the Slide Hammer. A clockwise
motion will open the clamps, while
counterclockwise motion will close them
1. After threading the proper Attachment (3, 4, 5 or 6) onto the end of the Slide Hammer (1) make sure the clamps of the Attachment are completely closed.
2. Insert the Attachment head into the
inner diameter of the bearing.
3. Grasp the Attachment head while
turning the Handle clockwise until
the Attachment clamps open and are
snug against the bearing lining.
4. Firmly grasp the Slide Hammer and
Handle with both hands. Spread
your feet shoulder-width apart.
5. Gently push Slide Hammer forward.
Make sure your fingers are not in
the way of the sliding action.
6. Forcefully pull Slide Hammer backward
towards your body. Watch bearing
for movement. Bearing should pull
out evenly. If the Bearing pulls out
unevenly during this operation, stop.
Remove the Bearing Puller and gently
tap the bearing with a rubber mallet
until it is even, then start again.
7. Repeat steps 4 thru 6 until bearing has
successfully pulled free of its location.
8. Close the Attachment clamps by
twisting Handle counterclockwise.
Then remove the bearing
Maintenance and Servicing
1. BEFORE EACH USE, inspect the general condition of the Bearing Puller. Check for loose attachments, misalignment or binding of moving
parts, cracked or broken attachments, and any other condition that may affect its safe operation. If any abnormality is found, have the problem
corrected before further use.
2. AFTER EACH USE, wipe off Bearing Puller with clean, moist cloth.
3. Lubricate Attachments regularly to ensure smooth operation.
4. Replace Attachment if threads begin to wear and it will not attach to Slide Hammer.
|
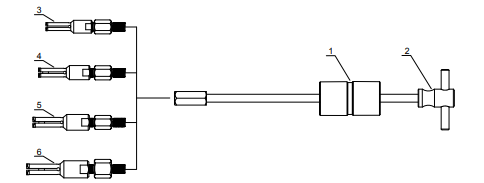
Parts List and Diagram
|
||
|
Part
|
Description
|
Qty
|
|
1
|
Slide Hammer
|
1
|
|
2
|
Handle
|
1
|
|
3
|
Attachment 3/8" to 1/2"
|
1
|
4 | Attachment 9/16" to 11/16" | 1 |
5 | Attachment 5/8" to 1" | 1 |
6 | Attachment 1" to 1-1/4" | 1 |